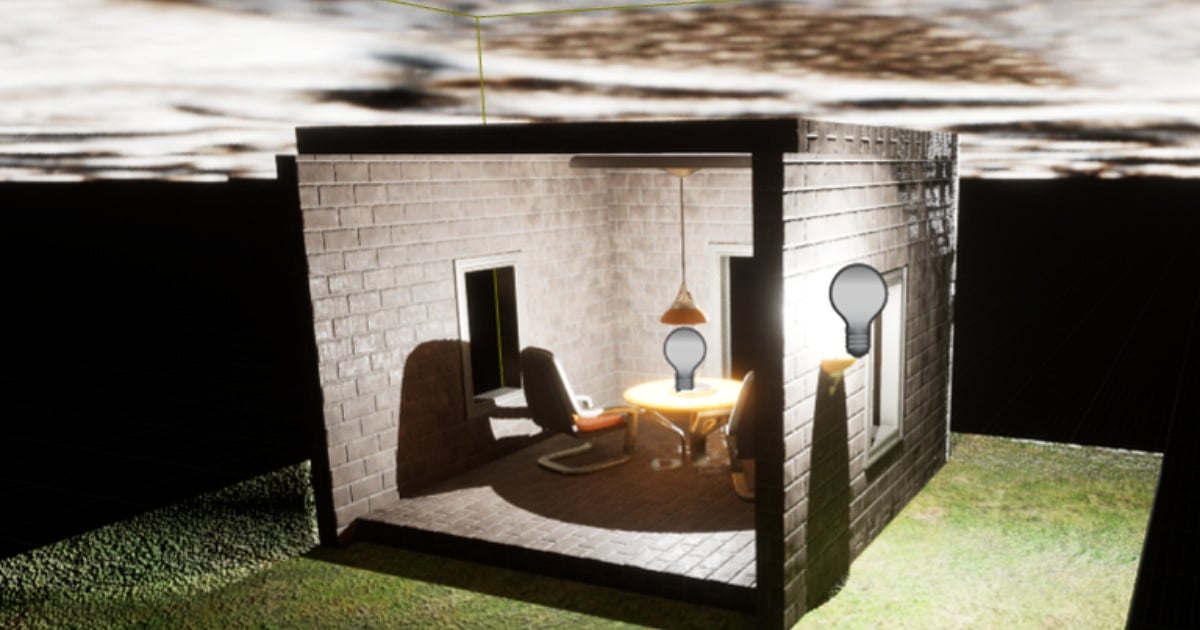
Setting up your digital workshop for UE5.
Unreal Engine 5 Beginner Guide: Build Your Project From Scratch
Master Unreal Engine 5 with this step-by-step beginner guide. Learn to build a 3D project from scratch using UE5 blueprints, level design, and Windows packaging.
Highlights
- Initialize Unreal Engine 5 using the Third Person Template and visual Blueprints instead of coding.
- Greybox level layouts in the Viewport and script interactive features using collision triggers.
- Import assets via Fab Megascans and compile the pipeline into a standalone Windows executable.
Unreal Engine 5 (UE5) has fundamentally changed how we think about digital creation. Whether you are dreaming of building the next viral indie hit or just want to explore the world of real-time 3D, the barrier to entry has never been lower. Epic Games’ official framework actively champions a hands-on, template-driven approach for newcomers, proving that you don't need a massive team to create something playable.
The fastest way to master this powerhouse engine is to build one small, functional scene from start to finish, then package it into a standalone Windows executable. In this guided walkthrough, we will take you through the entire pipeline, from installation to a finished build, while tackling the most common beginner roadblocks along the way.
System Requirements and Epic Games Launcher Setup
Before diving into world-building, your "digital workshop" needs to be properly provisioned. Unreal Engine 5 utilizes revolutionary technologies like Nanite for virtualized geometry and Lumen for dynamic global illumination, both of which demand modern hardware.
Hardware Benchmarks
- Memory: At least 32 GB of RAM is recommended for stable editor performance.
- Graphics: A dedicated GPU with full DirectX 12 compatibility.
- Storage: An SSD is strongly recommended. The engine continuously reads and writes massive asset streams to keep the viewport stable; older mechanical hard drives will cause severe bottlenecking.
The Epic Games Launcher serves as your central hub for managing engine versions, active projects, plugins, and marketplace content.
Step-by-Step Setup
- Download and install the Epic Games Launcher from the official website.
- Sign in with your Epic account, navigate to the Unreal Engine tab on the left sidebar, and select the Library section at the top.
- Click the (+) icon next to "Engine Versions" to add a new slot.
- Select the latest stable production release (such as UE 5.4 or 5.5) rather than experimental preview builds, and click Install.
Common Error: IS-FC06 (Unable to write file chunks) or the engine download fails/stalls midway. This can happen because of file system, cache, permissions, or disk-space issues.
The Fix: Ensure your target installation drive is formatted to NTFS to accommodate UE5’s large file chunks. If the issue persists, clear your launcher cache, free up adequate disk space, or right-click the launcher icon and select Run as Administrator to bypass system permission limits.

Pexel
Initiating Your Project: The Third Person Template
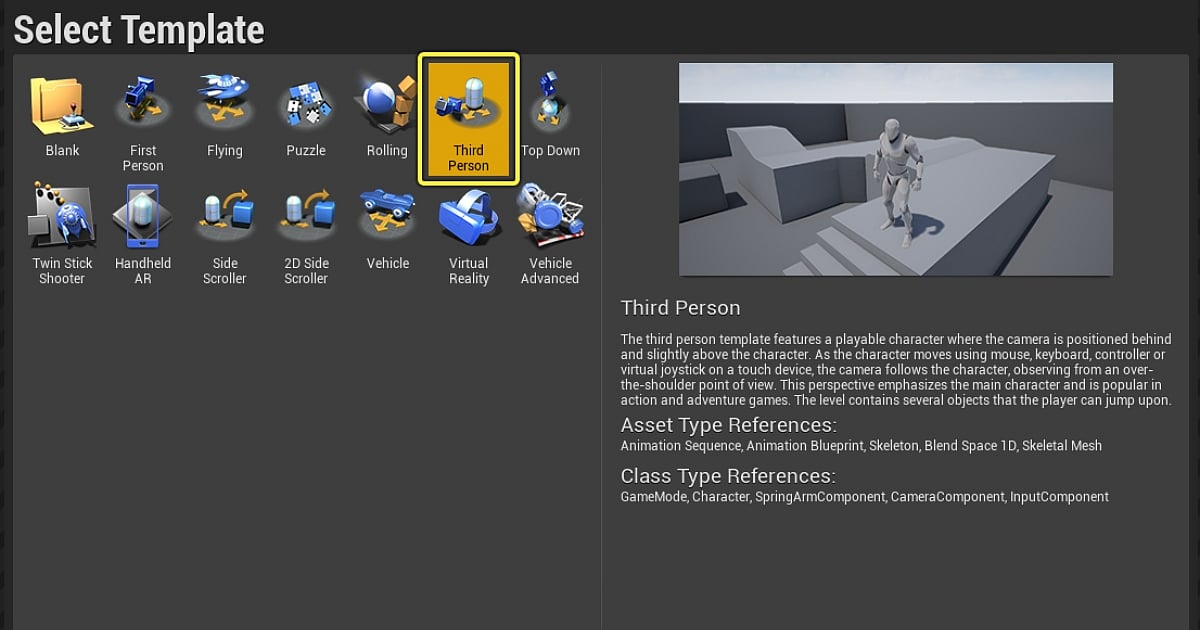
Launching the engine brings you to the Project Browser. For your very first project, starting with a clean slate can be overwhelming. Utilizing a pre-configured template gives you an immediate foundation to analyze and build upon.
Project Configuration Pointers
- The Template: Select the Third Person Template from the Games category. It comes out of the box with character movement, an active camera arm, and a rigged character mannequin.
- The Architecture: Choose Blueprint over C++. Blueprints are Unreal’s visual scripting system, allowing you to design sophisticated gameplay mechanics by connecting nodes rather than writing code lines.
- Quality Settings: Set the target quality to Maximum and ensure Starter Content is checked. This populates your initial library with fundamental materials, shapes, and audio cues.
- Directory Path: Keep your project name clear and save it in a short directory path (e.g., C:/Projects/). Deeply nested folders can trigger file-path length limitations during final compilation.
Common Error: The project opens successfully, but the viewport is completely blank, or the expected character assets are missing from the content folders.
The Fix: This typically happens if a "Blank" project template was selected accidentally. Re-open the Project Browser and verify that the "Third Person" icon is actively highlighted before hitting create. If your folder paths are too long, move the project folder closer to the root of your hard drive.
Epic Games
Mastering the Workspace: Navigation and Layout
The Unreal Editor layout is highly logical, though it can look intimidating at first glance. Familiarizing yourself with four core panels will give you complete control over your environment.
Core Editor Panels
- 3D Viewport: Your main window into the virtual world where you place, select, and manipulate objects.
- Content Drawer /Content Browser: The storage vault holding all your 3D models, textures, blueprints, and audio. Access it instantly using the Ctrl + Spacebar shortcut.
- Outliner: Positioned on the top right, this panel lists every single actor currently residing in your active level.
- Details Panel: Located below the Outliner, this context-aware panel displays the specific properties, scales, materials, and collision parameters of whatever item you have selected.
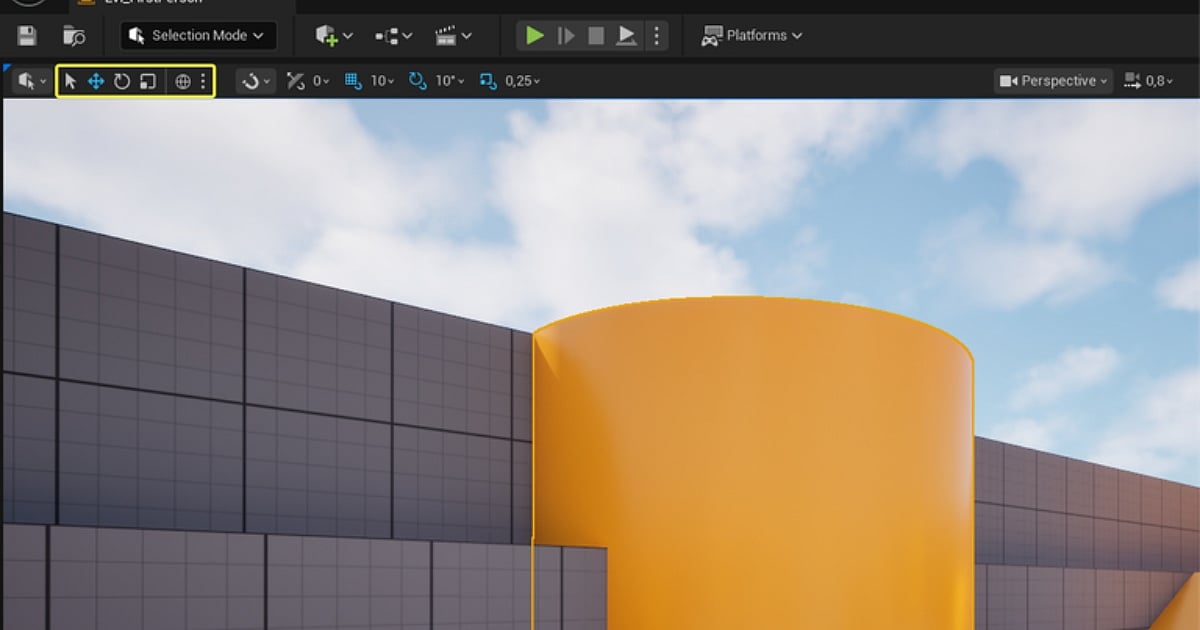
Essential Navigation Rules
- Flight Controls: Hold down the Right Mouse Button (RMB) inside the viewport to look around, and use the W, A, S, and D keys to fly through the level like a spectator camera.
- The Big Three Hotkeys: Select an asset and use W for Translation (Move), E for Rotation, and R for Scaling.
- Engine Scale: Always remember the structural metric:
1 Unreal Unit (UU)=1 Centimeter (cm)
Keeping this scale in mind prevents creating environments that dwarf your player character.
Common Error: A panel is accidentally closed or dragged out of place, causing the default editor layout to break. Alternatively, an object is placed but vanishes entirely from the Viewport view.
The Fix: If you lose your panels, go to the top menu bar and select Window > Load Layout > Default Editor Layout to instantly restore the interface. If an object vanishes, find its name in the Outliner, select it, and press the F key to automatically focus the camera directly on it.
Epic Games
Level Design 101: Blocking Out the Sandbox
With navigation mastered, it is time to build a playable space. This process is called "greyboxing" or "blocking out." Your goal here is to establish boundaries, structural flow, and scale before worrying about high-fidelity artwork.
Level Construction Pointers
- Use basic geometric shapes (cubes, cylinders) from the Place Actors panel to lay down a solid floor, perimeter walls, and basic obstacles.
- Ensure your level layout features clear pathways, a central arena, or a simple ramp structure to thoroughly test your character's jumping and navigation limits.
- Verify that a Player Start actor is present in the level. This marker dictates exactly where your character spawns when gameplay begins.
- Press the Play button on the top toolbar to jump into the level and test the physical scale of your geometry in real-time.
Common Error: Pressing Play causes the character to fall through the world infinitely, or the movement controls fail to respond altogether.
The Fix: Ensure your floor meshes have active collision geometry enabled in their details panel. If your character doesn't spawn or move, check World Settings and verify that the GameMode Override is pointing directly to the ThirdPersonGameMode asset included with your template.
Epic Games
Visual Scripting: Creating Your First Blueprint Interaction
To turn your static level into an interactive game, you need game logic. We will construct a simple collectible coin that disappears when the player runs into it, introducing you to the fundamentals of trigger volumes and communication nodes.
Blueprint Programming Steps
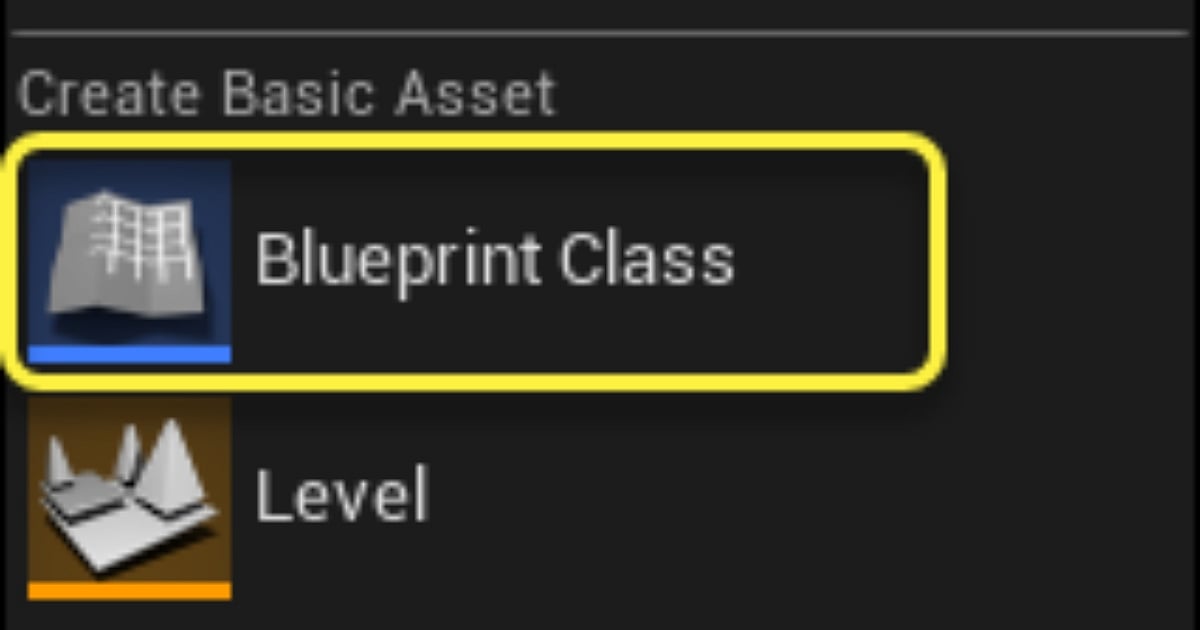
- Right-click in your Content Drawer, choose Blueprint Class, select Actor as the parent, and name it BP_CollectibleCoin.
- Double-click the asset to open the Blueprint Editor. In the Components panel, add a Sphere Collision component to serve as detection volume, and a small Static Mesh (like a cylinder or sphere) to represent the physical coin.
- Navigate to the Event Graph tab. Right-click the Sphere Collision component, choose Add Event, and select On Component Begin Overlap.
- Drag a wire out from the Other Actor pin of the overlap node, search for Cast to ThirdPersonCharacter, and connect it. This step ensures that only the player can pick up the coin.
- Drag a wire from the output execution pin of the Cast node, search for Destroy Actor, and select it. Click Compile and Save in the top left, then drag your new blueprint from the Content Drawer directly into your level.
Common Error: The character walks right through the coin in the level, but the asset refuses to disappear or trigger the logic.
The Fix: Open your BP_CollectibleCoin editor, select the Sphere Collision component, and inspect the Details panel. Ensure that Generate Overlap Events is checked and that the 'Collision Presets' dropdown is set to an overlap-friendly configuration. Crucially, don't forget to hit Compile after making graph changes, or the engine will continue running your old logic.
Epic Games
Adding High-Fidelity Detail: Fab and Megascans Integration
A gray environment is excellent for testing, but a real game needs texture and atmosphere. To quickly bring your world to life, use Fab to host the massive Quixel Megascans library, which provides access to Epic marketplace content, including Megascans-based assets.
Material and Asset Sourcing Pointers
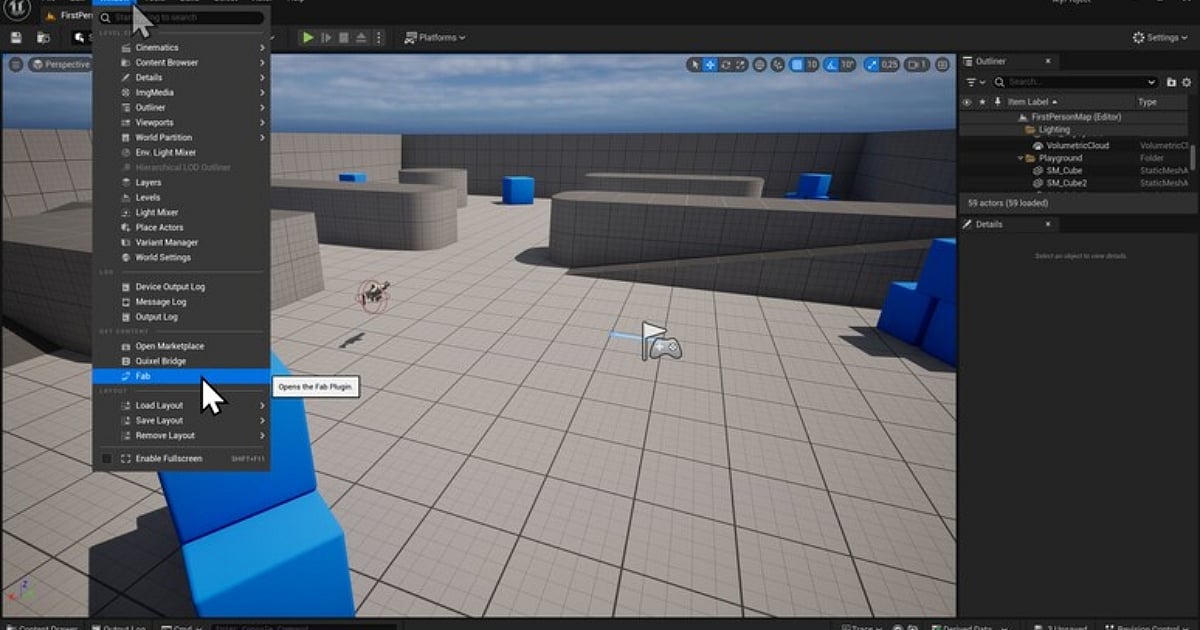
- Open the Fab window from the engine's main toolbar or the Window menu.
- Browse or search for high-quality, real-world assets like "Icelandic Rock" surfaces, mossy ground textures, or architectural props.
- Select an asset, choose your desired texture resolution, and click Add to Project to drop it straight into your Content Drawer.
- Drag your newly acquired Megascans assets into the Viewport to replace your basic grey blockout shapes.
- For better computer’s performance, right-click the imported 3D mesh asset in your Content Drawer and verify that Nanite > Enable is toggled on.
Common Error: The Fab panel displays an endless loading loop or tells you to "add asset to library" without letting you download, despite being logged into your account.
The Fix: This is an authentication sync hitch between the internal engine browser and the launcher. Log out of your Epic Games account inside the Fab panel and the main Epic Games Launcher, restart the applications, and log back in to refresh your licensing token.
Epic Games
Production Finish: Preparing and Packaging for Windows
Packaging compiles all your project assets, scripts, and levels into a highly optimized, standalone .exe folder that can run natively on Windows PCs without needing the Unreal Editor open.
The Packaging Checklist
- Even if your project uses 100% Blueprints and zero code, Unreal Engine may still require Visual Studio 2022 installed on your machine to build files. Ensure you check the Desktop development with C++ workload during the Visual Studio installation process.
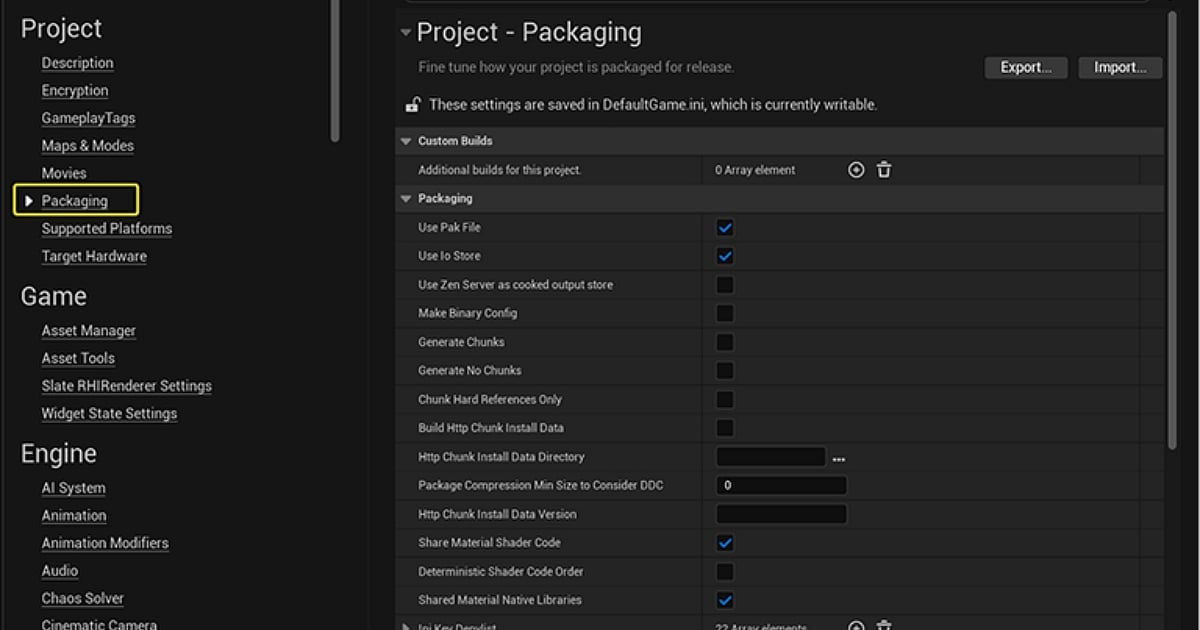
- Open your project settings within the editor, go to Project > Maps & Modes, and find the Game Default Map option. Set this to your specific custom level so the game knows exactly which world to load when booted.
- Navigate to the main toolbar, click the Platforms menu, and select Windows.
- Set your Binary Configuration to Shipping for a clean, retail-ready build, or Development if you still want access to debug logs and performance readouts.
- Click Package Project, choose a target destination folder directly on your drive root (like C:/Builds/), and let the engine compile.
Common Error: The packaging process halts with a fatal red error in the Output Log referencing a "Path Too Long" exception or a missing toolchain.
The Fix: Windows has strict character limits on file paths. To resolve this, move your project folder and your target build destination folder as close to the root drive directory as possible. If the build complains about missing compiler tools, re-open the Visual Studio Installer and verify that the "Desktop development with C++" toolsets and Windows SDKs are completely updated.
Epic Games
Post-Build Testing and Pipeline Maintenance
Once the editor notifies you that packaging is complete, navigate to your target folder, open the compiled Windows directory, and launch your standalone executable file. Testing your game outside of the editor environment provides an accurate representation of how it performs on retail hardware.
Pro-Tip Workflow Habits
- Iterative Testing: Don't wait until you've built a massive world to try packaging for the first time. Run a test build early in development to ensure your environment configurations are healthy.
- The Golden Loop: The ideal development rhythm is simple: add one feature, test it immediately in the editor, compile your blueprints, and regularly back up your project directory.
- Consult the Logs: If a packaged build crashes upon startup, open your project's Saved/Logs folder. The text file inside logs usually points you toward the missing asset, reference, or configuration issue causing the crash.
Common Error: The packaged game launches, but it boots into the default template test map rather than the custom level you carefully designed.
The Fix: Re-open your Project Settings, double-check the Maps & Modes configuration panel, and confirm that both the Editor Startup Map and Game Default Map dropdowns are pointing specifically to your new custom map file before rebuilding.
By following this production pipeline from initial engine download to standalone deployment, you've conquered the primary phases of the Unreal Engine 5 workflow. From here, the only true limit is your imagination.

Author
Krishna Goswami is a content writer at Outlook India, where she delves into the vibrant worlds of pop culture, gaming, and esports. A graduate of the Indian Institute of Mass Communication (IIMC) with a PG Diploma in English Journalism, she brings a strong journalistic foundation to her work. Her prior newsroom experience equips her to deliver sharp, insightful, and engaging content on the latest trends in the digital world.
Krishna Goswami is a content writer at Outlook India, where she delves into the vibrant worlds of pop culture, gaming, and esports. A graduate of the Indian Institute of Mass Communication (IIMC) with a PG Diploma in English Journalism, she brings a strong journalistic foundation to her work. Her prior newsroom experience equips her to deliver sharp, insightful, and engaging content on the latest trends in the digital world.

Related Articles